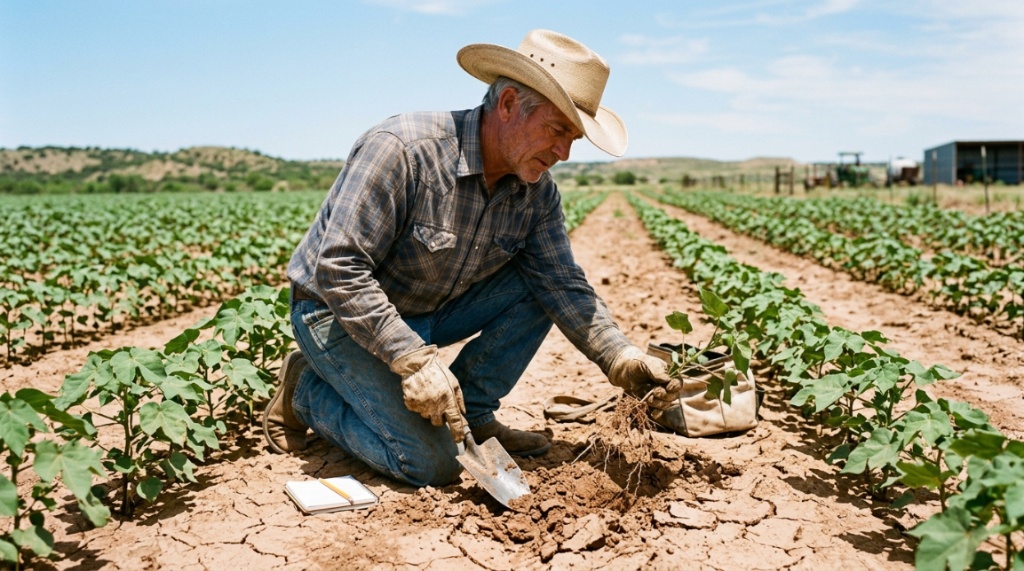
You’ve spent hours amending your garden beds, only to watch your tender transplants wilt under the brutal Texas sun. The problem isn’t your watering schedule—it’s likely your tool. Digging a narrow, awkward hole in dense clay or shifting sandy loam can damage roots and doom seedlings before they establish. The right transplanter makes the job effortless, but not every tool works in every Texas region. You need a durable, ergonomic tool that tackles our unique soil conditions. This guide breaks down exactly what to look for, so you can plant with confidence and actually enjoy the process.
What Makes Texas Soil So Tough on Transplanters?
Texas soil presents a unique set of challenges that can quickly break a cheap tool or exhaust your wrist. Understanding your local dirt is the first step to choosing a transplanter that will last. The primary culprits are heavy clay, rocky limestone, and shifting sand—often all within the same county.
Dealing with Expansive Clay Soils
Central and North Texas are notorious for “black gumbo” or expansive clay. This soil is sticky when wet and rock-hard when dry. A standard trowel will bend or snap in these conditions. You need a transplanter with a sharp, narrow blade and a thick gauge of steel to penetrate the compacted earth. Look for tools with a powder-coated finish to prevent soil from sticking to the blade. A serrated edge can also help saw through tough clay clods, reducing the pressure you need to apply.
Navigating Rocky and Shallow Terrain
The Hill Country and West Texas present a different beast: limestone rock and shallow, caliche-laden soil. Here, a pointed tip is your best friend. A blunt or rounded blade will bounce off rocks, making digging nearly impossible. Opt for a transplanter with a sharp, pointed tip that can wedge into narrow cracks and crevices. This allows you to create a planting hole without having to excavate large rocks. The tool must also have a sturdy handle construction that won’t wobble or snap when you apply downward force. Learn how to properly fertilize soil for a vegetable garden to ensure your newly transplanted crops thrive in local conditions.
Managing Sandy and Loose Soils
East Texas and the Gulf Coast have sandy loam that drains quickly. While this soil is easier to dig, it often collapses back into the hole as you remove the tool. A wider, spoon-shaped blade is more effective here, as it holds more soil and creates a cavity that stays open longer. The angle of the blade is also critical—a more pronounced bend helps you lift soil cleanly without it spilling out prematurely.
Why a Dedicated Transplanter Beats a Regular Trowel

A garden trowel is designed for general tasks like planting bulbs or mixing soil, but a dedicated transplanter is engineered for one specific job: getting a whole root ball into the ground safely. The difference lies in the blade length, width, and overall ergonomics.
Longer Blade for Deeper Root Beds
Most standard trowels have a blade length of 3 to 4 inches, which is simply too short for larger transplants like tomatoes or peppers. A transplanter’s blade is typically 5 to 7 inches long, allowing you to dig a hole deep enough to accommodate the root system without bending or breaking the taproot. This depth is crucial for proper root establishment and drought resistance, especially in Texas heat.
The “Pilot Hole” Strategy
Professional gardeners often use a two-step process: first, they use the transplanter to create a pilot hole; then, they drop the plant in and backfill. The wedge shape of a transplanter blade allows you to lever the tool forward to create a cavity, rather than just scooping out a pile of dirt. This method disturbs the surrounding soil less, preserving the soil structure and beneficial microbes that are essential for plant health in harsh climates.
Ergonomic Benefits You’ll Feel
The wide, cushioned handles on a good transplanter reduce hand fatigue and provide better grip. A standard trowel often has a narrow plastic handle that blisters your palm during a long planting session. A transplanting tool is designed to be used from a standing or kneeling position, with a vertical shaft that aligns with your forearm. This reduces wrist strain and allows you to use your larger arm muscles, making the job faster and more enjoyable.
Which Handle Material Offers the Best Durability in Heat?
Texas summers can reach 100°F+, and your transplanter will be sitting in the sun or scorching soil. The handle material isn’t just about comfort—it’s about whether the tool will survive the season without cracking or slipping.
Hardwood Handles: Classic and Strong
Ash and hickory are the gold standard for sturdy garden tools. They offer excellent shock absorption and a traditional feel that many gardeners prefer. However, they require maintenance. If you leave a wooden handle in the rain or scorching sun, it can dry out and crack. If you choose wood, rub it with linseed oil a couple of times a year. In dry West Texas, a wooden handle is more prone to splitting, so you must be diligent.
Fiberglass-Reinforced Handles: Low Maintenance
Fiberglass handles are incredibly durable and won’t warp, crack, or rot. They are a great option for Texas because they handle extreme temperatures well. The downside is that they can transmit more vibration to your hands, but on a transplanter, this is less of an issue. Look for a handle with a rubberized grip overlaid on the fiberglass to prevent slipping when your hands are sweaty.
Aluminum and Steel Handles: The Heavyweights
Some heavy-duty models feature a solid steel or aluminum shaft. These are highly durable and often combine the shaft and blade into a single piece of metal, meaning no weak points where the head meets the handle. While they are heavier, they provide the leverage needed to break through the hardest Texas clay. The trade-off is weight; you might fatigue more quickly if you have a large bed to plant.
How Do Blade Markings and Depth Guides Affect Planting Success?
When you’re bending over digging dozens of holes, consistency is key. A transplanter with measurement markings on the blade can be a game-changer for ensuring you plant at the correct depth every time.
Measuring for Consistent Soil Contact
Tomatoes need to be planted deep, while peppers prefer a shallower depth. Guesswork leads to inconsistent growth. A blade with etched inch or centimeter markings allows you to dig precisely the depth you need. This ensures that the root ball is fully covered but not suffocated. In Texas, planting too shallow exposes roots to extreme heat; too deep can cause stem rot. A depth guide removes the guesswork.
Avoiding the “Air Pocket” Pitfall
One of the biggest mistakes new gardeners make is not pressing the soil firmly around the transplant after planting. A transplanter with a built-in depth guide helps you dig the hole correctly, but you still must backfill properly. Some advanced models have a notched tab that acts as a “tamper” on the side of the blade, helping you press the soil down without compacting it too tightly. This reduces the risk of air pockets that can dry out the roots.
Reading the Angle of the Blade
Look closely at the angle between the blade and the shaft. A steeper angle (around 25 degrees) is better for digging in tight spaces, while a flatter angle is better for sweeping out a wider hole. For most Texas soils, a medium angle provides the best balance of leverage and control. If the blade is too straight, you’ll struggle to lever the soil; if it’s too bent, it becomes difficult to push into hard ground.
Can a Transplanter Handle Container Gardening and Raised Beds?
Absolutely, but the choice of tool shifts slightly depending on whether you are working in a raised bed or a pot. The physical constraints of these environments require a more compact approach.
Compact Models for Tight Spaces
If you are planting in a 4×4 raised bed, a long-handled transplanter might be overkill and awkward to maneuver. A hand-held, shorter model with a 5-inch blade is often more practical. It gives you the precision needed to plant closely without disturbing neighboring plants. In containers, you are often working with existing potting mix which is loose, so you don’t need a heavy-duty serrated blade; a smoother edge will suffice.
Mixing Soil Amendments
A transplanter can double as a mixing tool. In a raised bed, use the wide blade to turn in compost or slow-release fertilizer before planting. The sturdy blade can chop through soil amendments and blend them into the native soil below. This is a dual-purpose benefit that a standard trowel cannot provide effectively.
Vertical Storage Considerations
Raised beds often have a trellis or netting overhead. A long-handled tool can get caught easily. A standard 12-inch hand transplanter is easier to store in a small bucket or on a wall hook. If you buy a long-handled version, check if it has a hole in the handle for hanging. In humid East Texas, hanging your tools to air dry prevents rust and prolongs the tool’s life significantly.
Step-by-Step Guide to Using a Transplanter Without Damaging Roots
Even the best tool won’t help if your technique is flawed. The goal is to make the job faster and gentler on your plants. This simple process works for almost all soil types. For a deeper visual or specific brand recommendations, you can check out a detailed review of the best transplanter for Texas soil to see which models test well in these conditions.
Step 1: Water the Ground First
Never dig in dry soil, especially clay in Texas. Water the area deeply the evening before you plan to plant. This softens the soil and makes it much easier for the blade to penetrate. Wait until the soil is moist but not muddy—it should feel like a wrung-out sponge. Digging in wet mud can cause compaction and ruin the soil structure.
Step 2: The Push and Pull Method
Place the tip of the blade straight down into the soil. Use the ball of your foot, not your hand, to push the blade fully into the ground if you have a footstep model. For a hand model, push down firmly. Now, pull the handle toward you to widen the hole. This lever action creates an opening without lifting the soil out entirely.
Step 3: The Wiggle and Lift
Once you have the blade buried to the depth you need, wiggle the handle side to side to loosen the soil. Then, pull the transplanter straight out. The soil should come up with the blade, leaving a clean hole. If it doesn’t, push the blade in at a slight angle to grip the soil better.
Step 4: Set and Backfill
Place your transplant in the hole. Position it so the roots are spread out naturally. Gently break up the soil you removed and push it back around the plant. Press down firmly with your hands to remove air pockets. Water immediately to settle the soil around the roots.
Which Features to Prioritize for Houston vs. Dallas Climates?
While Texas is one large state, the gardening conditions between major cities vary wildly. Choosing a “one-size-fits-all” tool might leave you frustrated. Let’s break down the geographic differences.
Houston and Gulf Coast: Humidity and Heavy Rain
In Houston, the soil is acidic and often waterlogged. Rust is your biggest enemy. You must prioritize a stainless steel blade or a tool with a high-quality anti-rust coating. The handle should have a non-slip grip because it will be wet frequently. Durability against moisture is more critical than edge sharpness, as the soil is usually moist and easy to penetrate.
Dallas/Fort Worth: The Clay Battle
DFW sits on top of dense clay that turns into concrete in August. Here, you need the strongest, sharpest tool you can find. Look for a blade made from high-carbon steel that is heat-treated for strength. A serrated edge is beneficial for cutting through roots and hardpan. The handle should be sturdy enough to withstand stomping with your foot. A fiberglass core is preferable to wood, as it won’t crack under the stress of twisting and levering in hard ground.
San Antonio and Austin: Mixed Terrain
The I-35 corridor has a mix of limestone and clay. You need a versatile tool. A sharp, pointed tip is non-negotiable for the rocky areas. However, you also need a blade thick enough to handle clay clods. A medium-length blade (around 6 inches) is your best bet here. This combination allows you to navigate the rocky shallow beds of the Hill Country while still having enough blade to dig into the black clay in the valleys.
Is a Long-Handled or Hand-Held Transplanter Better for Your Back?
Back pain is the number one reason gardeners stop mid-season. The choice between a long-handled tool and a hand-held tool boils down to your physical mobility and how large your garden is.
Long-Handled Tools: The Back Saver
If you have a large in-ground garden or struggle with knee pain, a long-handled transplanter is the way to go. Usually ranging from 36 to 48 inches, these tools allow you to stand upright while digging. They often feature a foot peg on the blade to help you push the tool into the ground using your body weight. This drastically reduces stress on your back and wrists. The downside is less precision for smaller plants.
Hand-Held Tools: Maximum Precision
Hand-held transplanters (typically 12–16 inches long) offer ultimate control. They are perfect for working in raised beds, containers, or tight flower borders. You can get very close to the ground and see exactly what you are doing. However, they require you to bend or kneel. If you choose this option, invest in a good gardening kneeler. The trade-off is control versus strain.
The “Kneel vs. Bend” Decision
If you are planting 50 tomato plants in a field row, choose long-handled. If you are planting 5 herbs in a pot, choose hand-held. Many gardeners keep both in their shed. For Texas heat, standing reduces heat exhaustion risk because you are not crouching near the hot soil surface. If you have to spend 30 minutes digging, you want to minimize heat exposure—a long-handled tool helps you finish faster.
How to Maintain Your Transplanter for Longevity in Texas Conditions
A good transplanter is an investment. With the right care, it should last a decade or more, even with heavy use in abrasive Texas soil. Spending five minutes cleaning up after planting will save you money in the long run.
The Five-Minute Cleanup Routine
Never leave dirt on the blade to bake off in the sun. Immediately after use, take a hose or a bucket of water and rinse the blade thoroughly. Use a stiff wire brush to remove any caked-on clay. Dry the metal completely with a towel. Wet tools left in a shed will develop rust spots overnight, especially in humid Houston.
Sharpening Your Edge
Over time, hitting rocks and hard soil will dull the blade. A sharp transplanter is safer and easier to use. Use a flat file or a bench grinder to restore the edge. File in one direction along the original bevel angle. A sharp edge glides through the soil, reducing how much force you need to exert. Do this at the start of every planting season.
Oiling and Rust Prevention
Once the blade is dry, apply a light coat of linseed oil or a rust-preventive spray like WD-40. This creates a barrier against moisture. For wooden handles, sand down any rough spots and apply boiled linseed oil. This prevents cracks and splinters. During the off-season, hang your tools vertically rather than storing them on the ground to improve airflow.
Frequently Asked Questions
Question: What is the difference between a transplanter and a trowel?
A trowel has a short, scoop-shaped blade for general digging. A transplanter has a longer, narrower blade with measurement markings, designed specifically for digging deep holes and transplanting established seedlings or small plants. It often has a stronger build to handle harder soil.
Question: Are stainless steel transplanters worth the extra cost?
Yes, for gardeners in humid or coastal Texas areas. Stainless steel resists rust and corrosion significantly better than standard carbon steel. It slides easier through soil and doesn’t require as much maintenance. The initial cost is higher, but it eliminates the need for replacement due to rust.
Question: Can I use a transplanter to divide perennials?
Yes, a sturdy transplanter is excellent for dividing perennials. You can use the sharp blade to cut through dense root balls and lever sections apart. It functions similarly to a small spade or shovel. However, for very dense, woody roots, a proper spading fork is still the better choice.
Question: How deep should I dig a hole with a transplanter?
Generally, you should dig the hole twice as wide as the root ball and just as deep. Check the measurement markings on the blade. For most vegetables, the depth is between 4 and 6 inches. For shrubs, you’ll want a deeper hole, perhaps requiring a spade instead.
Question: Is a serrated edge necessary on a transplanter?
A serrated edge is beneficial if you are digging in heavy clay or cutting through small roots. It helps break up compacted soil. If you have sandy or loose soil, a smooth edge will suffice and is easier to clean. In Central Texas clay, a serrated edge is a significant advantage.
Question: Why does my transplanter keep bending?
Bending usually happens because the tool is made of weak, thin gauge steel, or you are using it on soil that is too hard or dry. Ensure the blade is at least 2mm thick and made of tempered steel. Always water the ground before digging in hard clay to reduce stress on the tool.
Conclusion
Choosing the right transplanter for Texas soil doesn’t have to be a gamble. It all comes down to understanding the specific challenges of your region—whether it’s the gumbo clay of Dallas, the rocky limestone of Austin, or the humidity of Houston. Look for a tool with a sharp, pointed blade for rocky areas, a thick steel construction for clay, and an ergonomic handle that protects your knees and back. Remember to prioritize rust resistance if you live near the Gulf Coast.
Don’t just buy the cheapest hand tool on the rack. Invest in quality, take care of it, and your back and plants will thank you. The right transplanter reduces planting time by half and ensures your seedlings get the strong start they need to survive a brutal summer. So, check your soil, match the tool, and get outsideyour garden won’t plant itself. Ready to find the perfect tool? Start with a reputable model that has proven durability in these exact conditions.